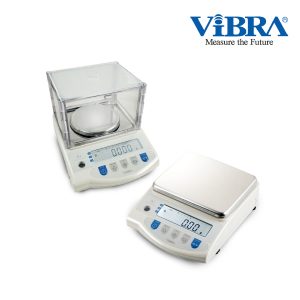
Specifications
1.Accuracy:Class Ⅲ
2. Sensitivity:1.5~3.0mV /V
3. Nonlinear:≤0.01%F.S
4. Working Voltage:DC:5V
5. Speed:10times/seconds(optional)
6. Internal Resolution:500000~1500000
Power Source
100~240V 50/60hz AC INPUT
12V/1A DC OUTPUT
6V/4AH Lead-acid rechargeable battery included
Low battery warnings
The display battery symbol lights up when battery voltage is lower than 5.6 V
The display battery symbol starts to flash when battery voltage is lower than 5.5V
The scale will shut off automatically when battery voltage is lower than 5.4V
Preparation
1. Please send this product is placed in the firm and flat place, don’t place in
vibration or shaking. And adjust four feet to keep the product stable, adjust the level
bubble to keep it in the level place.
2. Please use the current independently to avoid the interference of other electronics.
3. Please put nothing on the plate when switch on the power.
4. Please turn on 2-3 minutes before using.
5. Please avoid setting the products in the place where the humidity changing is over 80%.
6. Please put the things in the middle of the plate to keep the accuracy
Power Consumption
1. Approx.12mA
2. Approx.36mA with backlight
3.Approx.48mA with backlight and RS232 interface
4. Battery hours per charge:Approx.120hours
Load cell connection (for indicator)
1. The plug of load cell ,see the following drawing
2. Do not plug the connection when the indicator is on to protect the indicator and load cell.
Counting function specification
If in unit setup mode,set the pieces,then activate counting function ,
operate specification as below:
1. Press 【UNITS】 key for two seconds, it shows “0” in the display. At the same time, the light of “PCS” is lit up.
2. Press【net/gross】key,it shows “10”,press【net/gross】key,choose the quantity of the sample in turn.
3. Put the goods on the plate,press【print】key to confirm, it shows the quantity of the sample in the display.
4. In counting model,,press and hold【UNITS】 key to back to weighing model.
Function Key:
OFF: Press and hold the OFF key, the display will show “off” for 2 seconds then
the scale will turn off automatically
ON: Turn on the scale
UNITS/ESC: Units: To select desired weighing unit.
Esc: To escape setting in setup mode.
ZERO/◀: ZERO: To reset the weight to 0, but the displayed weight value has to
be less than ± 2% of maximum capacity.
: To move one space to the left or downward in setup mode.
TARE/▶:Tare: To subtract the container weight. Maximum tare = full capacity.
: To move one space to the right or upward in setup mode.
Net/Gross /▲:Net/Gross: To see gross and net weight when the scale is on tare status.
All other key will be disabled when gross weight is activated.
▲: To increase values upward in setup mode.
PRINT: Manually transmitting data through RS232 to computer or printer at
normal weighing mode(RS232 setup must be set at keyboard transmission 232 3 or 232 6 )
Functions keys of special kinds of scale(CWB22、CWT22)
PT: Press PT key, enter in the weight of the container and then put the container on
the plate. It shows the weight of the goods in the display.
HI: To set check weighing high weight:
LO: To set check weighing low weight
I/O SET: To program check weighing I/O conditions
M+/9: Accumulation key
Press this key; it can accumulate the total weights and total times. In setting model, it
means numeric number 9. It can accumulate at most 9999 times.
RECALL/6: To display total accumulation count and total accumulated weight. In setting model, it means numeric number 6.
MC/ 3: Memory Clear key to clear all accumulated weight data (When the weighing unit is changed (ex: from kg to lb),
all accumulated data will be cleared automatically) (display cursor M+ lights off). In setting model, it means numeric number 3.
SAMPLE/ 8: press this key to enter in sample mode. In setting model, it means numeric number 8.
COUNT/5: Counting key. Press this key to enter in counting mode. In setting model, it means numeric number 5.
/2: To select “Lit. A” auto backlight, “Lit. on” backlight ON or “Lit oFF”
backlight OFF. Works as numeric number 2 in setup mode CE: Clear key
Standard functions operate
1. Display internal value and voltage
In weighing mode,press and hold 【Tare】key,and then press【Print】key,display
UF-1,and then press【Print】key,display internal value ,and then press【Print】
key,display BAT X.X,X.X which means battery voltage. Press 【UNITS】 key
twice to back to weighing model.
2. Check Weighing
In weighing mode,press and hold 【Tare】key,and then press【Print】key,display
UF-1,and then press【Tare】key,display UF-2,press【print】key,display 00000L,
set low weight,press【print】key,display 00000H,set high weight。press【print】
key,it shows b 000 to set the condition of beeping.
The method of setting high or low weight:press【net/gross】key to change number,
press【ZERO】key to move cursor to left or press【tare】key to move cursor to right.
And the low weight must be less than the high weight.
3. Auto power-off
In the weighing model, press and hold【tare】key, and then press【print】key,it shows
UF-1. Press 【tare】 key twice,it shows UF-3. Press【print】key,it shows A OFF
00,press【zero】key to move cursor to left or press【tare】key to move cursor to right.
Press【net/gross】key to add number, the number means the time of power off. For
example, the setting number is 01, when the weight in the plate is less than 9d and the
indicator does not work in one minute, the indicator will be power-off automatically.
Press【print】key to confirm, and press【units】key to back to weighing model.
4. Backlight
In the weighing model, press and hold【tare】key, and then press【print】key,it shows
UF-1. Press 【tare】 key for three times,it shows UF-4. Press【print】key,it shows
Lit A(auto backlight). Press【net/gross】key, it shows Lit on(backlight on) , Lit
0FF(backlight off). Press【print】key to confirm, and press【units】key to back to
weighing model.
5.RS 232(option)
In the weighing model, press and hold【tare】key, and then press【print】key,it shows
UF-1. Press 【tare】 key for five times,it shows UF-6. Press【print】key,it shows
232 0(factory default: no),Press【print】key to choose 1-10:
6. Weighing speed
In the weighing model, press and hold【tare】key, and then press【print】key,it shows
UF-1. Press 【tare】 key for six times,it shows UF-7. Press【print】key,it shows
SPEEd 1 (factory default),press【net/gross】key to choose 1-3.
1: standard speed 2: fast speed 3: slow speed
7. Display condition at zero
In the weighing model, press and hold【tare】key, and then press【print】key,it shows
UF-1. Press 【tare】 key for seven times,it shows UF-8. Press【print】key,it shows
Z P 1,press【net/gross】key to choose 1-5, the number ,means the quantity of
divisions not display at zero. Press【print】key to confirm, and press【units】key to
back to weighing model.
8. G value
In the weighing model, press and hold【tare】key, and then press【print】key,it shows
UF-1. Press 【tare】 key for eight times,it shows UF-9. Press【print】key,it shows
-00-,and then shows 9.79423(G value of the manufacturing place). And then press
【print】 key to adjust the G value of the using place, the first number in the left
begins to twinkle, and press【net/gross】key to choose the number. Press【ZERO】
key to move cursor to left or press【tare】key to move cursor to right. Press【print】
key to confirm, and press【units】key to back to weighing model.
Calibration:
1. Weight and zero calibration
In the weighing model, press and hold【print】 key, and then press 【ZERO】key,
it shows ECF-1. Press 【print】 key, it shows CAL Z to begin zero calibration. Press
【print】key, it shows the weight which was calibrated last time. Use numeric key to
change the weight, and then put the required weight on the plate. And then press
【print】key to finish calibration.
2. Zero calibration
In the weighing model, press and hold 【print】key, and then press 【ZERO】key,
it shows ECF-1. And then press 【net/gross】key, it shows ECF-2. Press 【print】key,
it shows CAL Z. Press 【print】key to calibrate zero and back to weighing model.
3. Weight calibration
In the weighing model, press and hold 【print】 key, and then press【ZERO】 key,
it shows ECF-1. And then press【net/gross】key twice, it shows ECF-3. Press 【print】
key, it shows the weight which was calibrated last time in the Weighing Window. Use
numeric key to change the weight, and then put the required weight on the plate. And
then press 【print】 key to finish calibration.
Error Messages
Err H Initial zero too high (over 10% of max. cap.)
Err L Initial zero too low (less than 10% of max. cap.)
Err N Unstable internal value
hhhhhh Overload, over the max. capacity + 9d
—— Total price exceeded 999999
Remark
0 0 0
A B C
A: Buzzer on: 0= Stable not required 1= Stable required
B: LCD indicator and RELAY on: 0= Stable not required 1= Stable required
C: Buzzer beeps when: 0= Buzzer off 1= OK 2= LO and HI
Related products
Products
Products
Products
Products
Products
Products

 About Us
 Company History
 Videos
 Articles
 News
News Services
 Pressure & Vacuum
 Dimension
 Temperature & Humidity
 Torque & Force
 Electrical
 Mass & Balance
 Glassware & Chemical
 Medical
 Flow
Flow Trainings
 Promotion
 Pressure & Vacuum
 Dimension
 Temperature & Humidity
 Torque & Force
 Electrical
 Mass & Balance
 Glassware & Chemical
 Others